This Lucky Basket is approximately 3-3/4" x 3-3/4" x 3" (6" with handle) with the bottom of the box measuring 2.625" x 2.625. The file comes with the one piece basket base, the basket handle, a basket handle mat, two clover cut-out mats, two inside clovers, and a basket bottom insert. The file is compatible with the 8x12 and 12x12 mats. This basket would be perfect for St. Patrick's Day as well as Good Luck treats!
This box is easy to assemble making it great for bulk creation or last minute gifts!
Adhere the basket mats in place and fold on the score lines. Adhere the mat to the handle. Place adhesive on the side tab as well as the three bottom tabs. Adhere the side together to form the basket shape then push the three bottom tabs in and adhere the bottom closed. There is a square cut the same color of the basket, that is adhere to the inside bottom to finish off the look (hides the tabs). Insert the handle (Tip: I rub mine against the edge of my desk to give it a curve) and use foam adhesive to pop up the clover pieces! Fill and embellish as desired!
I am taking a little break from flowers today to try another Print and Cut file!
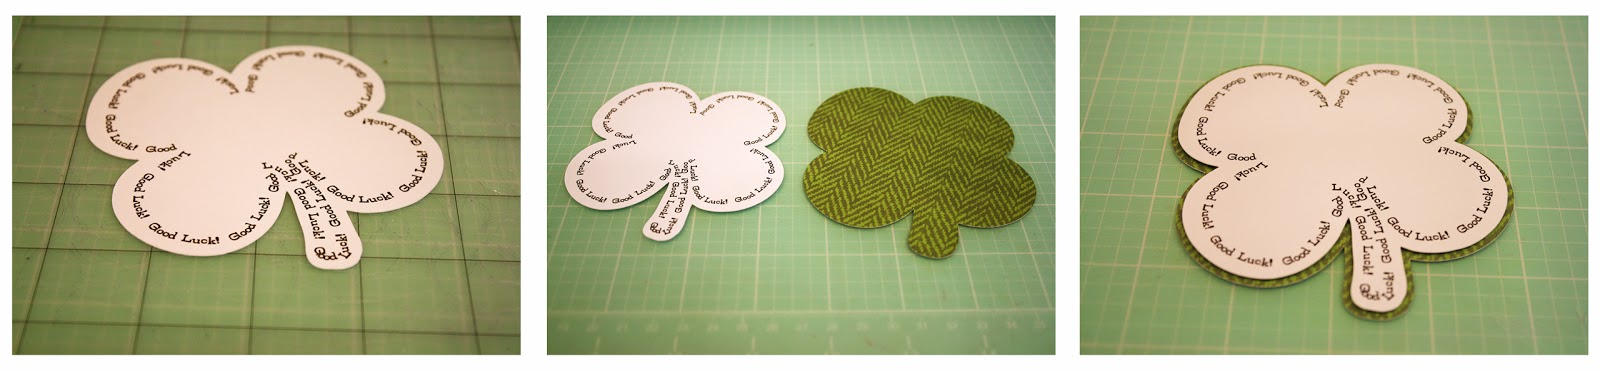
This is my Good Luck Print and Cut file and it comes with the shaped word art piece as well as a mat cut. This file can be sized to fit your needs and it compatible with both the 8x12 and 12x12 mats.
Here is the tutorial:
1. Bring in the file to Silhouette Studio and click on your Page Tool Window (4th from the right) and select your paper size. I switched mine to Letter, using my 12x12 mat.
2. Next click on the Registration Window icon (2nd from right) and click the Show Reg Marks box. Move your word art image so that it is not in the grey areas on the mat.
3. Next, click the Send to Silhouette button (6th from left) and print your word art image.
4. Once your piece has printed, follow the steps on the screen.
Make sure you have your paper on your mat with the arrow pointing
so it mimics your virtual screen!
5. Click on the Detect Automatically link and your Silhouette will look and find the registration marks from your print.
6. Next click on the Cut button!
7. Once you have your cut complete, move the pieces over so that your mat is in the cut area. Turn off the Registration marks and put your paper back to 12x12 (or the size you need it for your machine)!
8. Once you have your pieces cut, simply adhere the word art image on top of the mat!
Things have gone all green around here! Today I am sharing some of my new files for St. Patrick's Day which can also double for wishing luck! Let's start with a few new bags...
This file is approximately 4-1/2" x 2-1/2" x 2-1/2" when finished and is compatible with the 8x12 and 12x12 mats. The file comes with the box base, a handle, and two clover cuts to customize the box.
Next up is one of my favorites of the week...
This gift bag is approximately 4-1/2" x 8" x 2-3/4" (without the handle included in measurements) and is compatible with both the 8x12 and 12x12 mats. The file comes with the bag base (cut two), a bag bottom panel, the front panel (cut two), side panel (cut two), inside bottom panel, handle piece, and a large clover cut (cut two). You can find a tutorial here.
This box is approximately 2-1/4" x 6-1/2" x 3" when cut with the Cameo. The file can be cut with the Portrait but it will need to be sized down to fit the mat properly. The file comes with the box base which includes large clover cuts on the sides and smaller clover cuts along side tabs which fold down, and four mats to change the color under the clovers.
This box assembles quickly making these perfect for bulk treats! You can even write a name or message on the front clover to identify whom the treat is to/from! The finished project is approximately 4-1/4" x 4" x 1-1/2" and has holes in the back clover to place a sucker stem. To assemble, fold on all the score lines and then place adhesive on the four tabs and adhere to the box sides. I use foam adhesive to adhere the clover cuts in place. This is compatible with both the 8x12 or 12x12 mats.
This layered bow is perfect for cards, boxes, and gifts! It compatible with the 8x12 and 12x12 mats and can be sized to fit your needs!
You can find all of these files HERE!
Good Morning! Today I am sharing my new St. Patrick's Day Cards and Tags. Many of these can be used for wishing 'Good Luck' to others as well...I always love when I can get multiple uses from a cut file!
This A2 (4-1/4" x 5-1/2") card comes with the card base which includes the detail cuts, a mat to place behind the detail cuts, two clover cuts, and a heart. This file is compatible with the 8x12 and 12x12 mats and the clover & heart pieces can be used separate from the card if you like!

This accordion fold card comes with the base and mats and is easy to put together! To get an A2 sized card, you will need to cut this one on a 12x12 mat. However, the cut can be scaled down for a smaller version which will create a card around 3-1/2" wide x 5.18" tall.
You can find a tutorial for this card base here.
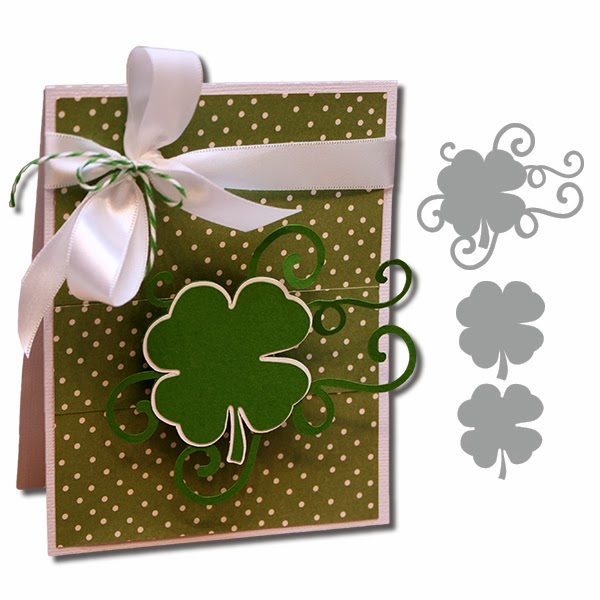
This A2 (4-1/4" x 5-1/2") card comes with the card base, a mat, a pop-up piece that fits on the mat, the swirly clover, and two clovers to match in case you want to change the color like I have! This file is compatible with the 8x12 and 12x12 mats and the clover pieces can be used separate from the card if you like! You can find a tutorial for this one here.
This is such a great gift to make to let others know just how lucky you feel to have them in your life. This file comes with the card base, eight decorative panels, three lucky note cuts, and two clover shapes and it is compatible with both the 8x12 and 12x12 mats. The finished size is approximately 3" x 4-1/4" when folded and standard gift cards will also fit inside. You can find a tutorial for this one here.
Clover Tag Set:
This cute tag is sizable to fit your needs and is compatible with the 8x12 and 12x12 mats. The file comes with the tag base, a middle layer with a smaller cut clover, and the top layer which has a larger clover cut and faux stitching.
Here is a photo to show the detail:
You can find all of these files in my Silhouette Store this week along with these:
Yesterday I was up on the SRM Blog with my Good Luck Kit!
It seems we always have something going on around our house and I am always in need of little packages to help encourage and support the kids (and their friends!)! Today I am sharing my Gift of Tubes project which features a milk carton (cut on the Silhouette), two tubes of strawberry flavor mix, and a tube stuffed full of mini peppermint marshmallows! My daughter loves strawberry milk and it is a special treat in our house so I thought that this Good Luck Kit would be perfect for her upcoming finals! I used the Live Life, Think Pink stickers as well as the "Good Luck" sentiment from the Express Yourself, St. Patrick's Day stickers....and I think she is going to LOVE it! :)
Other Supplies:
Die Cut: 2 Milk Carton Tote by Lori Whitlock (Silhouette America)
Tag: 1 9/16" Metal Rim (Avery)
Cardstock: Pink Bling (Bazzill)
Patterned Paper: Chloe's Garden Pyramid Pad (Momenta)
Twine: Blossom (The Twinery)
Ribbon (May Arts)
Nesquick Strawberry Powder (Nestle)
Jet-Puffed Mallow Bits (Kraft)