This gift card wallet is approximately 4-1/4" x 3-1/2" when assembled and holds 4 standard sized gifts cards in their own space. Perfect for the upcoming Holidays and all those hard to buy for teenagers or to show appreciation for those amazing teachers out there! The file is compatible with the 12x12 or larger platforms.
Outside:
Inside:
Tutorial:
1. Cut out your pieces. Fold the base on the score lines so that the first score line folds down and accordion fold from here. Place your mat on the front facing side, lining up the holes as shown. Layer your bow pieces and adhere the long strip to the present under the "lid" area.
2. Flip your base over. Place adhesive on the top fold as shown, this will press down and hide the ribbon. Cut a 24" piece of ribbon and string through as shown.
3. Adhere the top part down to cover ribbon. This is the inside back of the wallet. Place 1/4" adhesive tape (or small bead of glue) down the next two areas that peak up (shown in image with white adhesive tape).
4. Adhere the middle section in to form the first "pocket". Adhere the second piece up to form the other "pocket" areas.
5. Flip the bottom up and place adhesive as shown. Adhere in place.
6. Insert gift cards and embellish as desired!
These Present Gift Card Holders fit a standard gift card. The gift top pulls up to reveal the gift card. The finished project is approximately 5-1/4" x 4" and is compatible with both the 8x12 and 12x12 mats.
Be Merry Present Gift Card Holder
Here is the tutorial:
1. Cut all your pieces, fold on the score lines and then layer the mats. Make sure to keep the inner pieces for the letters to adhere them in the tag (the B and R centers). Insert your gift card (optional).
2. Flip your present base and the present top over and add 1/4" adhesive to the edges as shown (white adhesive).
3. Flip your gift card holder over and add adhesive to the top back area.
4. Adhere the edges of the present base and insert the gift card holder inside. Make sure it is sitting at the bottom.
5. Line the present top up with the present bottom, centering. Adhere the gift card holder down.
6. Adhere the sides together.
7. Adhere your mistletoe leaves together then place a small foam adhesive piece in the center. Tie ribbon/twine to the tag.
8. Adhere the mistletoe piece to the center of the present topper.
9. Adhere tag to the mistletoe center. Now your gift card holder is ready to use!
Bow Present Gift Card Holder
This Pop Up Present Card is 4.25" x 6" and comes with the card base, a front mat, the pop-up inside mat, two "present" mats, and the bow pieces shown. Inside the present, you can place one Ghirardelli Square as well! File is compatible with both the 8x12 and 12x12 mats.
Here is the card with the Ghirardelli chocolate square inside:
Layered Gift Bow
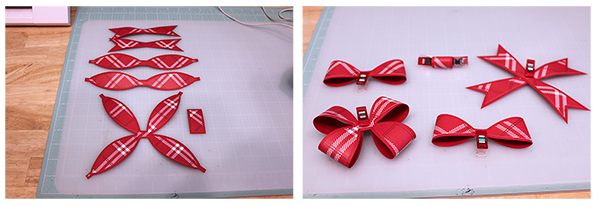
This bow is perfect for Holiday gift wrapping, placing on vases, or even for the front of a card! The bow can be sized to fit your needs and is compatible with both the 8x12 and 12x12 mats!
These bag toppers are sized to fit Sandwich sized zip bags measuring approximately 6-1/2" x 2-1/2" in size when folded and they are compatible with both the 8x12 and 12x12 bags. The files come with all the paper elements shown and all of the elements can be used separately as well.
Here's the tutorial for the Santa:

1. Cut out all the pieces.
2. Adhere the solid face piece on the main santa piece.
3. Adhere the beard piece on the face.
4. Use foam adhesive to adhere the hat scallops in place.
5. Adhere the large ball to the hat end and use foam adhesive to adhere the mustache in place.
6. Use foam adhesive to adhere the small ball on the hat end.
7. Adhere the eyes in place. Use foam adhesive to adhere the nose on the mustache. (I forgot to take a photo with the nose in place :) You can see it in the main image though!)
Please note that the photo appears to have a backing, but it is just my
backdrop showing. The topper only covers the top of the bag on both sides.
Today I am sharing two new petal boxes.
This box comes sized to fit the 12x12 mat and will cut the larger image shown. The file can be scaled down to just under 8" to cut the smaller version shown. The larger when finished is approximately 5-1/2" x 3-3/4" x 3-1/2" and the smaller 3-1/2" x 2-3/4" x 2-1/4". The file comes with the box base and the two bow pieces for each side of the box.
Here is the tutorial:
1. Cut out all the pieces.
2. Adhere the larger bows on the box then adhere the smaller bows on the larger, centering.
3. Fold the box on all the score lines.
4. Hold the center package pieces together and bring one of the sides over the packages. Note, you will have to push the package pieces down as you are bringing the side over.
5. Slide the slot all the way over so it looks like this now. Fill your box with goodies.
6. Bring the other side over the package now. I like to add a little removable adhesive between the packages so they stay together.
7. Slide that slot all the way over so your box looks like this now!
This box comes sized to fit the 12x12 mat and will cut the larger image shown. The file can be scaled down to just under 8" to cut the smaller version shown. The larger when finished is approximately 6-1/4" x 4" x 4" and the smaller 4-1/2" x 2-3/4" x 2-3/4". The file comes with the box base, which includes the tree shapes.
Here is the tutorial:
1. Cut out the box.
2. Fold the box on all the score lines then hold the center tree pieces together.
3. Bring one of the sides over the trees. Note, you will have to push the tree pieces down as you are bringing the side over. Slide the slot all the way over and fill your box with goodies.
4. Bring the other side over the tree now and slide that slot all the way over so your box looks like this now! I like to add a little removable adhesive between the trees so they stay together.
5. Here is the complete box for Cameo and Portrait.