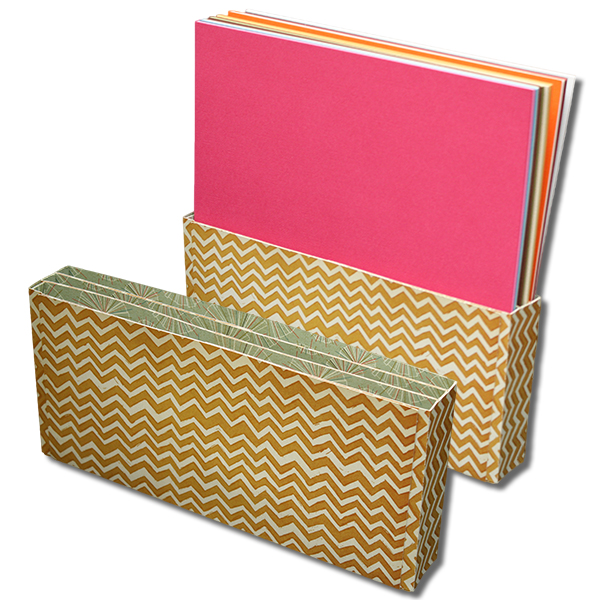
This 8-1/2" x 11" Paper Storage box is approximately
8-3/4" x 5-1/2" x 3" and it has three sections to help you sort your papers! The file is compatible with both the 8x12 and 12x12 mats.
Here is the tutorial:
1. Cut out the box base and fold on the score lines. If you are using the Portrait base, you will have two pieces. To create your base piece, adhere the smaller piece on top of the larger using the guidelines on the larger piece. Place adhesive on the two front tabs and the two center tabs.
2. Adhere throw side tabs to the box sides and then bring up the front piece and adhere the sides.
3. Do this for all three boxes.
4. Adhere the boxes together to form one unit.
5. Grab your two side pieces and fold on the score lines. Add adhesive to the side tabs of each.
6. Adhere the side pieces in place to cover.
7. Next grab your panel pieces for the front and back of the box. Fold on the score line and add adhesive to the tab piece of each.
8. Adhere the panels in place.
9. Your box should look like this now.
10. To cover the seam on the bottom of your box, grab the straight panel and place adhesive on the backside.
11. Adhere it to the bottom of the box.
12. Now you are ready to fill your box with your papers!
This 8-1/2" x 11" desk organizer is approximately 8-3/4" x 5-1/2" x 3" and it has one large unit in the back that is able to hold 8-1/2" x 11" paper then four compartments that are each 4-1/4" wide. I have one of my most used paper packs in the back then on the right side compartments I have my Project Life 4x6 cards standing up and my 2x3 cards in sideways. In the left compartments I have 4x6 envelopes and blank cards. The file is compatible with both the 8x12 and 12x12 mats.
Here is the tutorial:
1. Cut out all the pieces then start with the 8-1/2"x 11" holder. If you are using a Cameo, this is a single cut large piece (shown in image). If you are using a Portrait, this is a 2-piece cut. You will need to adhere the smaller one on top of the larger one using the three small guidelines on the larger piece. Fold on all the score marks then add adhesive to the two center tabs.
2. Adhere the center tabs to the box side as shown. Then add adhesive to the two long tabs that are on the table still.
3. Bring the sides up and adhere them together so your box looks like this.
4. Next grab your compartment boxes. You will have two of each size (my images just show one pair). Fold on the score lines and add adhesive to the center tabs.
5. Adhere the center tabs to the box sides then apply adhesive along the two long tabs as you did with the other box.
6. Bring the sides up and adhere them together.
7. This image shows all four boxes completed.
8. Place adhesive all over the back of one of the larger compartment boxes.
9. Then adhere the compartment box to the 8-1/2"x11" box as shown.
10. Repeat this for the remaining larger compartment box, adhering them side by side.
11. Next adhere the two smaller compartment boxes as your did previously. Your box should look like this image now.
12. Next grab your cover pieces and fold on the score lines.
13. These fold up like this image. You need to place adhesive all over the inside of the piece and then adhere one to the front of the box and the other to the back of the box. These pieces provide strength for the box and also hide some of the seams.
14. Your box will look like this now.
15. This is what the bottom of the box should look like (one seam).
16. Now your ready to fill your box with goodies!
This 8x8 Paper Holder is approximately 8-1/8" x 2-1/2" x 4-1/4" when finished and is compatible with both the 8x12 and 12x12 mats. You can cut multiples and adhere them side by side or even behind each other...or if you have a lot of 8x8 pads, you may need to do both!
Here is the tutorial:
1. Cut out the box base pieces and fold on all the score marks. Add adhesive as shown.
2. Adhere the two pieces together in the center to make one large piece.
3. Fold the edge over and adhere it to the other side of the paper.
5. Place adhesive on the bottom tabs as shown.
6. Adhere the top tab down, pressing the two side tabs firmly to adhere.
7. Then pull the bottom tab up to finish the box bottom.
8. Your box will look like this now.
9. Adhere the decorative mats on the the box.
10. Then fill with your 8x8 papers and paper pads!
This 12x12 Paper Storage Unit has three sections to help you sort your papers! The box measures approximately 12-1/4" x 5-1/2" x 1-3/4" and will cut on both the 8x12 and 12x12 mats!
Here is the tutorial:
1. Cut out three of each of the box pieces. Fold on the score lines.
2-3. Place adhesive as shown on each of the pieces.
4. Adhere two of the pieces together as shown.
5. Place adhesive on the small tabs and on the two back tabs.
6. Adhere the small tabs to the box sides.
7. Then adhere the larger tabs to the box sides to form the box. Repeat these steps for the remaining two boxes.
8. You will now have three boxes like these.
9. Place adhesive on the side of one of the boxes.
10. Adhere it to the second box. Then adhere the remaining box so you have a set of three like this.
11. Cut out the remaining pieces.
12. Place adhesive on the two small side pieces.
13. Adhere the piece on to the side of the box.
14. Adhere the second piece to the opposite side of the box.
15. Next place adhesive on the front and back panels.
16. Line up the score line with the bottom edge and the top edge and adhere in place.
17. Do this for both sides.
18. Finally place adhesive on the long piece and adhere it along the bottom to hide the seams.
19. Fill with your 12x12 papers!
This box is perfect for holding your 6x6 Paper pads (I have 11 stored in the one shown) and it also holds the larger ribbon spools too! This box was designed to cut on the 12x12 mat. It can be resized to fit the Portrait mat but it will not be able to store the 6x6 mats if scaled down.
Tutorial:
1. Cut out the pieces of the 6x6 Paper Storage file in your desired papers.
2. Fold the box piece on all the score lines.
3. Adhere your decorative papers in the corresponding areas.
4. Place a strong adhesive on the four tabs.
5. Turn your box over and place adhesive on the two long tab-like pieces (created by the score lines) as shown.
6. Adhere your four tabs to the sides of the box to form.
7. Adhere the two long tab-like pieces down into the box.
8. Fill your box with your 6x6 paper pads or ribbons spools!
Here is an image with the larger ribbon spools...
(I believe these are the 3yd spools and I have it holding 9 in various widths)