Good Morning!
Spellbinders is celebrating the arrival of the new Winter 2013 line into the local stores we shop and having a Explore Beyond Blog Frenzy which shows step by step tutorials from the designers and of course they have fabulous giveaways too! If you missed any of the days, just click here to join in.
Today is Samantha Walker's day and she is featuring
I just love the detail in both of these sets and they are so versatile!
I love how they look mixed together...
Supplies:
Cardstock: Cream (Recollections and Bazzil)
Ribbon: Cream Crinkly (May Arts)
Twine: Buttercream (The Twinery)
Pearls: Cream (The Paper Studio)
Wood Chips: Hearts (Freckled Fawn)
Good morning! I am so excited to share that The Twinery is now holding monthly themed challenges and I just cannot wait to see what you all come up with! You can see all the details over on The Twinery Blog!
This months theme is Polka Dots!
For my take on the Polka Dot challenge, I decided to take things BIG and go with large polka dots! I created five different sized spots using an adhesive backed paper and different colors of twine!
Here is a quick tutorial:
1. Punch out five circles using a adhesive backed
paper and cut a 20" piece of twine.
2. Remove the adhesive back and place a small
circle of twine in the middle of the circle.
3. Continue wrapping your twine
around itself as shown.
4. When you get the twine circle to the size
you want, simply trim any excess adhesive
paper away. Press firmly down on the
twine and you are good to go!
Supplies:
Cardstock: White and Black (Recollections)
Patterned Paper: 2wenty Thr3e 6x6 (Cosmo Cricket)
Punches: Circle Maker (Creative Memories)
and Corner Punch (EK Success)
Embellishments: Woodchip Speech Bubble (Freckled Fawn)
and Misc. Black Sequins
Be sure to head over to the The Twinery Blog to see more takes on the challenge and learn how you could enter to WIN!
Stacy Scott Buller
Congratulations Stacy! Please send me an email at jamielanedesigns@gmail.com to claim your prize!
Thanks to everyone who stopped by to participate, I truly appreciate all the sweet comments and I am thrilled that you guys enjoyed the giveaway!
Be sure to check back in often for more opportunities to win!
Good Morning! I have been playing with Washi Tape from Freckled Fawn! Have you heard of Freckled Fawn? If not, you are in for a real treat! Freckled Fawn is an online shop filled with hundreds of delightful washi tapes and other supplies perfect for your crafting needs and today they are offering a $20 gift card to one of my followers!
All you have to do is be a follower of my blog and leave a comment on this post and for an extra entry, head over to Freckled Fawn's Facebook page to like them and tell them I sent you!
For my card today, I am using the Freckled Fawn Washi Tape to create a background! I love how easy it is to use and all the texture it brings!
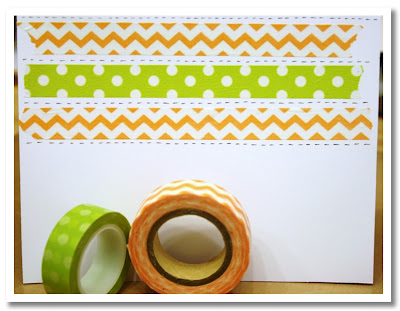
And here is my finished card:
Supplies:
Stamp: Haunted House (Sweet Stamp Shop)
Cricut Imagine Tutorial:
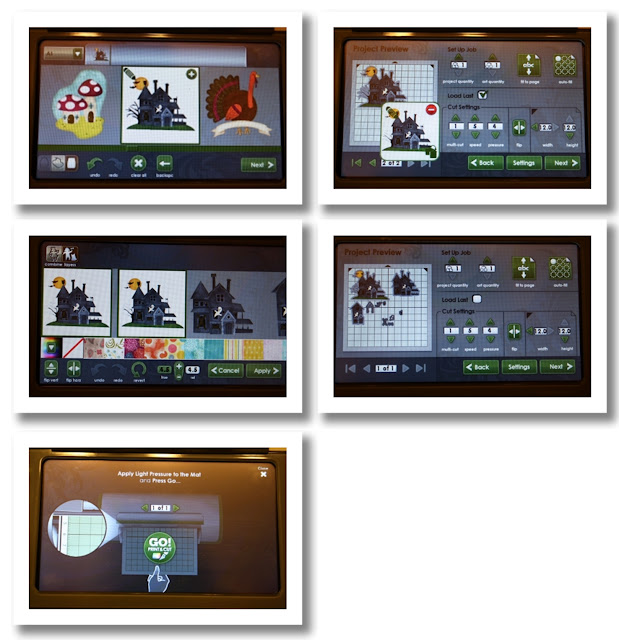
1. Using the Enjoy the Seasons Cricut Imagine Cartridge, add the haunted house image by clicking the "+" button. Then click next.
2. Click on the image on the screen then choice the pencil icon to edit.
3. Change the size to 4.5" and then click the Layers icon on the top left side of the screen.
4. Your page should look similar to this. Click "Next".
5. Click on "Go" and follow the instructions.
6. Apply your Washi Tape to the cardstock background and then used foam adhesive to adhere the haunted house and all the pieces.
Don't forget to leave a comment on this post and head over to Freckled Fawn's Facebook page to like them and tell them I sent you for your chance to win the $20 gift card to Freckled Fawn!
The winner will be selected on Monday 10/8 so be sure to stop back in!


