This Wallet Sized Frame Ornament is perfect for decorating your tree, wall hooks, bulletin boards, and more! It is a quick and easy decoration that looks great against your Christmas tree, across walls, table fronts, entryways, and more! Such a great way to show off your favorite people or pets! Each frame is approximately 3-1/4" x 4-1/4" and holds a standard wallet sized photo (2-1/2" x 3-1/2"). The file comes with the photo frame and an insert (in case you want to mat smaller images, or use it to hand write a message!) and is compatible with both the 8x12 and 12x12 mats. The frames have a fold over tab with a 1/4" hole so twine/ribbon can easily be attached and a little tab at the bottom to tuck the bottom of the photo into so it will stay in place while hanging. You can use with or without the snowflake.
Here is the tutorial:
1. Cut out your frame, fold on the score lines, and add adhesive to the side tab and the top tab. Tie your ribbon or twine through the hole for hanging.
2. Fold the open frame piece over, tucking the side tab in and bringing the top tab down. Adhere all in place. Insert photo or insert provided through the open bottom then tuck it into the little tab so it remains in place.
3. Adhere the snowflake in place if desired and hang!
Graduation is JUST around the corner!
These Wallet Sized Grade Frames are perfect for all those graduation parties. It is a quick and easy decoration that looks great against your table backdrops, across walls, table fronts, entryways, and more! Such a great way to show off your grad! Each frame is approximately 3-1/4" x 4-1/4" and holds a standard wallet sized photo (2-1/2" x 3-1/2"). The file comes with the two photo frames and an insert (in case you want to mat smaller images, or if you are missing a photo you can hand write a message!) and is compatible with both the 8x12 and 12x12 mats. The frames have a fold over tab so twine/ribbon can easily be attached. Looks for all SEVEN files to complete the set!
Here is the tutorial:
1. Cut out the frames in each file. NOTE: You will not need the insert piece unless you are matting a smaller photo or handwriting a message. Place a small strip of adhesive across the twine/ribbon tab as shown. I am using 1/8" double sided adhesive tape.
2. The back side of your frame will have adhesive down the side tab. Insert and center your photo using the tab cut to hold the bottom of the photo.
3. Fold over your side tab and adhere to the frame. Add another piece of adhesive on the tab front.
4. Close the frame, securing your adhesive to the frame back. NOTE: This tab was placed in the file so that adhesive would not interfere with the image.
5. Flip your frame over and insert your twine/ribbon toward the score line.
6. Then expose your adhesive and press down firmly. If you are using a thin ribbon or twine, you can still slide the frame so that you can position easily.
7-8. Continue building and attaching frames!
9. The photos will easily lift through the front so that they can be removed.
10. The tab slot shows through the back of the frame so that you can easily tuck images back in even when the frames are complete.
Tips for cutting: Use a smooth cardstock and slow your machine down. I am using a 60# weight cardstock and a speed of 4.
Today I am sharing a couple cutting files that can be used for Valentine's Day Gifts!
This box is approximately 4-1/4" x 2-3/4" x 1" and comes with a hinged lid. The file comes with the box base, love note cards, the scallop heart element and is compatible with both the 12x12 and 8x12 mats! You can find a tutorial for the box here!
This frame is approximately 8-1/2" x 7-1/2" when finished and holds a 4x6 photo with an opening of 4-1/2" x 3". The file comes with the base heart, the layered heart, and the back heart frame which includes the stand. The file is compatible with both the 8x12 and 12x12 mats.
You can find both of these files HERE!
I am really enjoying this file! The frame is approximately 7-1/4" x 9-1/2" and holds a 4"x6" photo. The file comes with the frame base, two frame mats, and the frame backing. This file is compatible with both the 12x12 and 8-1/2x12 mats. You can change the photos easily too!
Tutorial:
1. Cut out the four pieces
2. Add foam adhesive to the back of the first layering mat.
3. Adhere the layer to the frame base. Add foam adhesive to the back of the remaining layer.
4. Adhere the layer to the center of the frame.
5. Add adhesive to the bottom and sides of the frame backing. Do not place adhesive on the stand or along the top (this is where the photo slides in).
6. Adhere the backing on the frame. Insert your photo through the top.
7. Here is the front of the frame...
8. ...and the back!
This month one lucky winner will receive the fabulous
AND be sure to look extra closely at Step #4 to learn how you can get this FREE SVG and Silhouette Studio file:

1. Receive an additional entry for commenting on each of the other blogs in the blog hop.
2. Go here and follow Samantha Walker's blog
4. Sign up for an e-mail subscription to Samantha's blog and you will automatically receive a link to a free SVG cutting file that you can download and use on your personal electronic cutter. If you are already a subscriber, just enter in your information in the secure form on Samantha's blog! The free files will be e-mailed early next week!
To receive the additional entries and get the the free files, mention in your comment on Samantha's blog that you have done so!
WOW, that is 12 chances to win! How awesome is that!?
*******
For this month's Blog Hop the Creative Team has
been working with a Halloween theme and today I have a
SPOOKY home decor project to share!
I have created an 8-1/2" x 11" Spooky frame using the
following Samantha Walker products:
 |
| 5 Piece Shape Set Silhouette Store |
 |
| Halloween Washi Tape Word Silhouette Store |
 |
| Skull Cameo Frame Silhouette Store |
 |
| Digital Cuts or Masks Halloween Cameos Coming Soon to js.com |
 |
| Paris Girl 6x6 Collection |
 |
| Paris Girl 12x12 Collection |
|

Tutorial:
1. Trim green cardstock to fit on the outside of the frame, leaving a 1/4" border.
2. Cut the shape from the 5 piece shape so it fits the length of the cardstock.
3. Cut the Skull Cameo to fit within the shape.
4. Cut a second Skull Cameo, trimming away the frame. Ink the skull with charcoal ink.
5. Adhere the shape to the cardstock.
6. Use foam adhesive to adhere the Skull Cameo to the shape.
7. This photo shows where I have placed my foam.
8. Place the Skull Cameo in the center of the shape as shown.
9. Adhere the second skull on top of the Skull Cameo with foam adhesives.
10. Cut the Spooky Washi Tape and then trim a piece of green cardstock to fit underneath it.
11. Place foam adhesive on the back of the Spooky Washi Tape.
12. Adhere the washi tape cut to the green cardstock then place foam adhesive on the back of the set.
13. Adhere the Spooky under the skull as shown then ink the edges of the green cardstock.
14. I like to reuse frames, so for seasonal items I place a foam square in the center of the glass on my frame then adhere the green cardstock. This way, I can take the piece off and store it while using the frame for other projects :)
15. This is what your frame will look like. Decorate as desired. I added spider webs, a plastic spider (covered in glitter), a couple gems, and of course some flowers!
Thanks so much for stopping by!
Click on the image below to head over to Karen's blog!
Happy Hauntings...oops I mean "Hopping"!
Good morning!
Helmar is joining up with Unity and Susan K. Weckesser to bring you another week of amazing creations and I am so excited to be able to be apart of it!

Today I am sharing a double-sided frame that I created using several of Susan's papers along with her Unity stamps and of course some amazing adhesives from Helmar!
Supplies:
Patterned Papers: Beautiful Daydreams, Live In Color, Live In Color Tags,
Stamps: Painted Sentiments SB-981A by Susan K. Weckesser (Unity Stamps)
Adhesive: Adhesive Runner, 1/2" White Zapdots, 1/4" White Zapdots (Helmar)
Ink: Bundled Sage Distress Ink by Tim Holtz (Ranger)
Frame: Double-Sided 4x6, Tolsby (from IKEA)
Tutorial:
- Cut your papers for the first side of the frame.
- Use the Helmar Adhesive Runner to place adhesive
along the back edges of the long paper strip.
- Adhere the paper to the left edge of the frame
mat.
- Use ½” White Zapdots on the back of the Live In
Color Tag.
- Adhere the tag to the center of the frame mat.
- Use the Helmar Adhesive Runner to place adhesive
along the back of the scallop punched strip.
- Slide the frame mat into the frame and then
adhere the scallop punched strip as shown.
- Using the second frame mat, ink the “Create”
stamp with the Bundled Sage Distress Ink.
- Stamp the “Create” stamp at the top center of
the frame mat as shown.
- Next add the “Inspire” stamp as shown.
- Lastly,
add the “Love” stamp as shown.
- Fussy cut the three butterflies from Susan’s
paper and add ¼” White Zapdots to the back of each.
- Place the second frame mat in the frame then
adhere the butterflies as shown.
I love that the frame can be rotated for a different look, this will be a great addition to my art room!
Want to make one for yourself? Well, you are in luck! All Susan Weckesser Stamps are on sale through August 4th! Just click on the photo below!
Thanks so much for visiting, be sure to check out the Helmar blog all week! The Design Team projects are just fabulous!
Just a quick altered frame to share with you today! This is all from the Vacation Pyramid Pad from Momenta using some of their Sassy Stickers! One of my most favorite pictures of the girls...shortly after this photo was snapped, they found a dead mouse by their feet (which they hadn't noticed before) and they all began screaming and running around like a bunch of crazies!
And yes, I captured a photo of that too...
Love those girls!
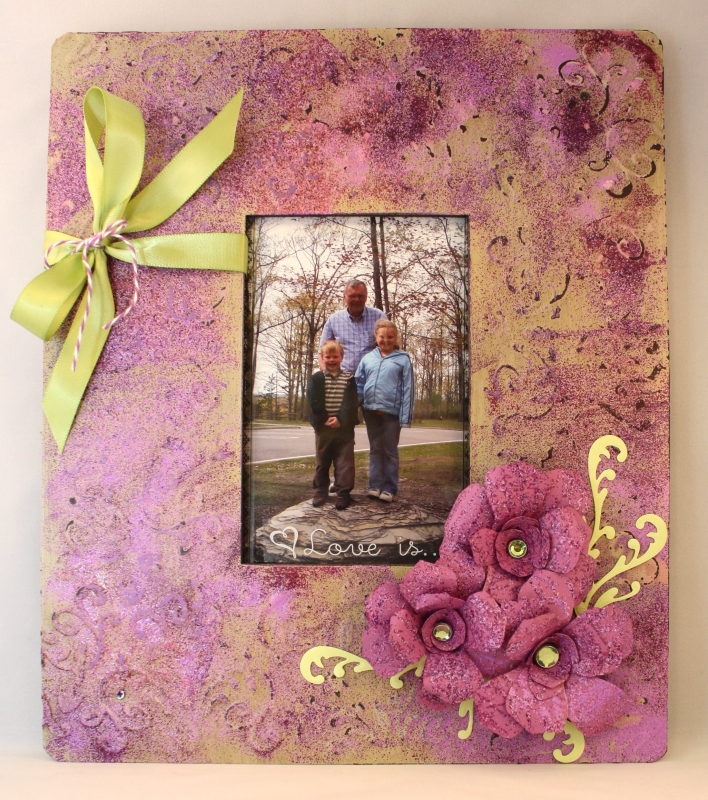
Hi guys! I am so excited to share today's project with you! I am going to start off with a little tutorial to show you how to transform a beat-up clearance frame into a beautiful display for your home (or to use as a gift)!
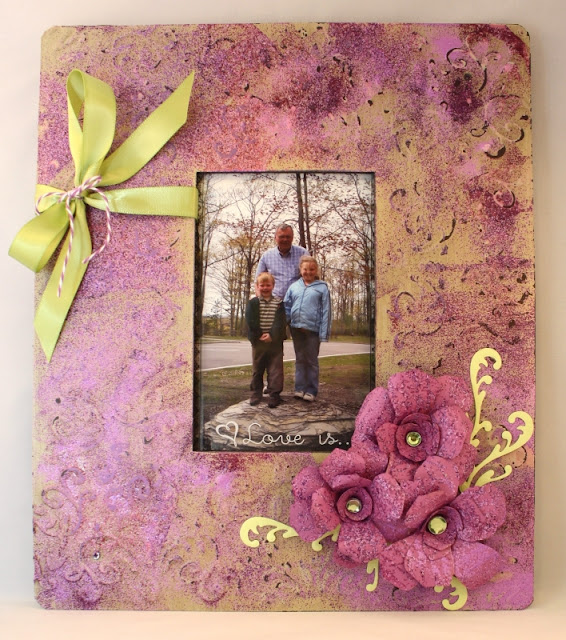
Aren't those flowers gorgeous? Those are from Samantha Walker's Silhouette Store!

Supplies:
Embossing Powders: Berrylicious and Presido Purple Suzy West Collection, WOW Embossing Powders
Stamps: Call Me Stamp Set, WOW Embossing Powders
Embossing Ink: Distress Embossing Ink by Tim Holtz, Ranger
Stickers: Fancy Sticker Sentiment #55003 Love and We've Got Your Sticker #53008 Forever, SRM
Baker's Twine:
Cardstock: Purple, Creative Memories and Green, Bazzill
Brads: Green, Creative Charms
Misc. Ribbon
Dies: Gardenia Spiral Flower by Samantha Walker for Silhouette America and Samantha Walker's Ornate Artisan Tags and Accents, Spellbinders
Be sure to head over to the WOW Blog where you can see this project and others that are featured in our group post today!