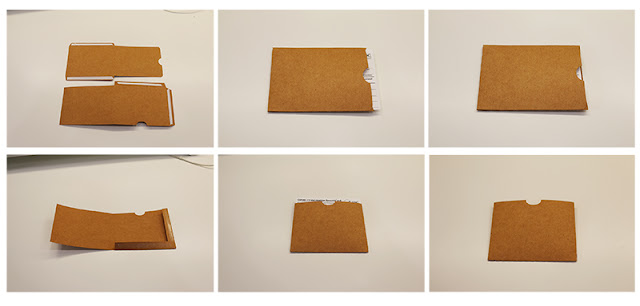
This file comes with the two cover/envelope styles shown. Each envelope is just over 4" x 3" and will hold the 4" x 3" CDC Covid-19 Vaccination Record Card(s).
These are easy to assemble, just place adhesive on the tabs and adhere together then insert your card or cards. It's an easy way to protect your Vaccination Record Card while at home or in your wallet or purse!
You can find this file on my Silhouette Store or in
SVG format (which works with Cricut Design Space)!
These Print and Cut pouches are created to fit a letter sized paper for printing and cuts with 8x12 or 12x12 mats. The pouch can hold many items, I use mine to hold thin cookies up to 3-1/2" in size. The pouch itself is colorless so that you can choose your own colored paper or color fill within the software. See my blog for more detailed images!
I really love the versatility of these envelope bags, there are so many uses for them! You can size them to fit your needs so they can hold tag, tickets, cookies, even small photos! You could even cut these in vellum to create your own glassine-like bags! All of these are compatible with both the 8x12 and 12x12 bags and follow the same tutorial. This bag comes sized at approximately 4-1/4" x 3-1/2" but can be sized to fit your needs.
You can also find coordinating Word Art pieces.
These files are compatible with both the 8x12 and 12x12 mats.
The cut files can be sized to fit your needs!
These envelope bags are similar to the taller ones I released earlier this year, except these are shorter! I really love the versatility of these bags, there are so many uses for them! You can size them to fit your needs so they can hold tag, tickets, cookies, even small photos! You could even cut these in vellum to create your own glassine-like bags! All of these are compatible with both the 8x12 and 12x12 bags and follow the same tutorial. This bag comes sized at approximately 4-1/4" x 3-1/2" but can be sized to fit your needs. All of the elements can be used separately as well.
Here's the tutorial:

1. Cut out all your pieces and fold on the score lines.
2. Place adhesive on the side tab and along the inside bottom tab.
3. Fold the front piece over and adhere to the side tab.
4. Fold the bottom tab up and adhere in place.
5. Adhere the scallop circle on with foam adhesive.
6. Adhere the Cookies for Santa circle on top of the solid circle then adhere in the center of the scallop circle with foam adhesive.
7. Adhere the holly and berries in place. Embellish and fill as desired!
Here's the tutorial for the ornament:
1. Cut out your pieces and fold the circles in half. Adhere the long skinny strip to the center of the envelope bag.
2. Place adhesive on one side of the circles. Adhere two circles sides together.
3. Adhere the other circle side in place.
4. Place adhesive on the back of the circle and adhere to the center of the envelope bag.
5. Adhere the bow piece at the top of the ornament.
6. Form the small strip into a loop and adhere in the center of the bow.
7. Your envelope bag should look similar to this now! Embellish and fill as desired.
Good morning! Today I am sharing a quick and easy Thank You Envelope which is perfect for gifting smaller gifts or even placing a card within!
Here's the tutorial:
1. Cut out all the pieces for the Thank You Flower Sentiment.
2. Use your skewer or pencil to curl the petals. Adhere the two center pieces together and push the points up.
3. Adhere the center into the middle of the smallest flower.
4-7. Push the petals up toward the center then adhere the flower into the next sized flower form staggering the petals slightly. Continue adding flowers and pushing the petals up toward the center until they are all in place.
8. Place a foam adhesive in the center of the sentiment.
9. Adhere the flower.
10. Size your envelope to fit your 12x12 mat and assemble. Tie the Pink/White dotted ribbon in a knot around the center of the bag. Place the Kiwi Velvet Ribbon around the bag above the dotted ribbon and tie with twine.
11. Tie the metal grey double faced satin ribbon around the dotted ribbon. Tie off in a bow to the side.
12. Adhere the flower sentiment in the center of the ribbons with foam adhesives.
Thanks so much for stopping by today!


