This Magician Hat Cupcake Holder holds a standard size cupcake! The Cupcake Holder has a bottom so you can fill this hat will other goodies as well! The file comes with the cupcake wrap, the cupcake bottom, the hat rim, and the pieces to make the magic wand.
This file is compatible with both the 8x12 and 12x12 mats.
Here is the tutorial:
 1. Cut out all the pieces.
2. Place adhesive on the back of all the tabs on the bottom piece.
1. Cut out all the pieces.
2. Place adhesive on the back of all the tabs on the bottom piece.
3. Bend the tabs up (the adhesive will be on the backside of each tab)
4. Insert the tab into the slot for the wrap. Insert the bottom into the top of the wrap and press down until it is flat with the surface. Adhere the tabs to the wrap side.
5. Place adhesive on the tabs of the wrap. Adhere the circle (hat rim) to the tabs.
Here are the steps for the wand:
1. Cut out all the pieces.
2. Fold the square in a diagonal, starting in one corner rolling to the next.
3. Remove the skewer from the rolled paper once adhesive is set.
4. Adhere the large white piece on one end by rolling it around the wand. Make sure to cover the black ends. Hold until the adhesive is set.
5. Repeat step 4 for the other white piece at the opposite end. Your wand should look like this now.
6. Fill your hat with goodies using the wand inside the hat or sitting beside to embellish!
This gift set is approximately 7" x 5-3/4" x 1-3/4" and come with the box base, divided area lid, and the coordinating mats shown. This box holds a cake mix, frosting tub, and two toppings (such as sprinkles). The file is compatible with both the 8x12 and 12x12 mats.
Here is the tutorial:
1. Cut out your pieces and fold on the score lines. Starting with the box base, place adhesive on the four tabs.
2. Adhere the tabs to the box sides to form the shape.
3. Grab your lid and place adhesive on the four tabs.
4. Adhere the tabs to the box sides to form the lid.
5. Place the lid on top of the box.
6-7. You can use the box like this...
8. Or adhere in the coordinating mats to the box base and lid.
For these boxes, I use a heavier card stock, such as 80# Basis, to help support the contents as they become heavy when grouped together!
This gift set is approximately 7" x 5-3/4" x 1-3/4" and come with the box base, divided area lid, and the coordinating mats shown. This box holds a cake mix, frosting tub, and cupcake wrappers. The file is compatible with both the 8x12 and 12x12 mats.
This gift set is approximately 7" x 5-3/4" x 1-3/4" and come with the box base, divided area lid, and the coordinating mats shown. This box holds a cookie mix (or cookie/cake box), cookie icing, and two toppings (shown are sprinkles and color mist). The file is compatible with both the 8x12 and 12x12 mats.
Hello and Happy Monday!
Today is the new release day at the Silhouette store
and I have lots of new card files to share with you!
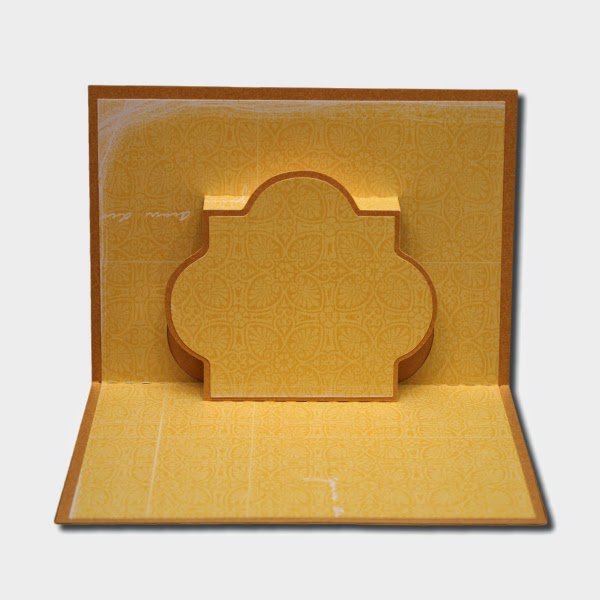
Today I am sharing my new A2 Pop Up Cards. These cards are 4-1/4" x 5-1/2" when finished and feature a pop up design in the inside. The files come with the card base, the inside pop-up mat, and mats for the pop up. The mats for the pop up pieces can also be used on the front of the card to coordinate the look! All of the files are compatible with both the 8x12 and 12x12 mats. I am hoping from the images you can see how to fold the inside mats. The long center fold is a valley then the others create the pop up. I always start by folding the center then carefully creasing the other folds as I fold the card mat down on itself as it would when you close the card.
This next one is an A7 size (5x7) and comes with all the pieces shown.
Making these cupcakes are safe enough for any diet! :)
Today I am sharing three new cupcake cards!
This
file comes with all the pieces you need to create this cupcake! You can use
this cupcake as an embellishment or on its own as a flat card. How cute would this be as an invitation with
the information on the back of the cupcake?
The accordion wrapper allows the cupcake to stand on its own!
Here's the tutorial:
1. Cut out all your pieces. Fold the wrapper piece in accordion folds.
2. Place adhesive on the backside of the two end pieces.
3. Adhere the left side of the accordion on the wrapper mat.
4. Stretch out the accordion wrapper and adhere to the right side of the wrapper mat.
5. Adhere the wrapper to the back of the cupcake cut.
6. Add foam adhesive to the back of the icing.
7. Adhere the icing on the cupcake, lining up the edges.
8. Adhere the cherry together then place a foam adhesive on the back of the cherry.
9. Adhere the cherry on the cupcake.
Here's the tutorial:
1. Cut out all your pieces. Fold the card base in half.
2. Adhere your wrapper pieces together and your cherry pieces together.
3. Adhere the wrapper on to the card base. Adhere the icing mat on the card base. Place foam adhesive on the back of the icing cut.
4. Adhere the icing on the cupcake cut, lining up the edges. Adhere the cherry on the icing with a foam adhesive.
This is my first attempt at a cupcake container and I absolutely loved creating it! This is a little different than most cupcake wraps that you will find as it has a bottom portion that the cupcake itself sits in. You can see more images in my tutorial photos which will help explain! And, since it has a bottom you can also store candies, small gifts, even gold coins!
This file comes with a cupcake band, three hat pieces (which is the bottom of the holder), a hat wrap, and the buckle. The file is compatible with both the 8x12 and 12x12 mats.
Here is the tutorial:
1. Cut out all the pieces and fold on the score marks.
2. Place adhesive on the center circle as shown (be careful not to apply glue to the tabs).
3. Adhere the solid circle (bottom), centering.
4. Flip the piece over and lift up the tabs.
5. Apply adhesive to the back of the top circle as shown.
6. Adhere it over the circle lining up the edges so it looks like this.
7. Wrap your band around and tuck the flap into the slot to hold. Place adhesive on the tabs of the circle piece.
8. Adhere the skinny end of the wrap down on the circle, pressing the tabs firmly.
9. Place adhesive on the back of the hat wrap.
10. Adhere it in place, wrapping as you go.
11. Adhere the buckle in the center of the hat wrap.
12. Fill your hat with a delicious cupcake! OR you could even use this to store candy or gold coins!
...and how cute would these little clovers be on a layout or card?
The file comes with four different sized clover: three 4-leafed clovers and one 3-leafed clover. Each clover has a score mark to bend the petal on so they stand off of your project, giving them lots of dimension! They can be sized to fit your needs and are compatible with both the 8x12 and 12x12 mats.
You can find both of these files HERE!
I had a request come in for inside card sentiments that could be used with sketch pens along with a couple others for birthday sketch sentiments, so I decided I would give this a try. This week in my Silhouette store you will find two files that coordinate together:
This A2 (4-1/4" x 5-1/2") card comes with the card base, a card base mat, a decorative mat, and the cupcake pieces shown. This file is compatible with the 8x12 and 12x12 mats and the pieces can be used separate from the card if you like!
and...
With this file you will receive four sketch files and four cut frames.
These inserts will fit any A2 card.
Here is a tutorial for how to use the sketch file:
(and don't worry it isn't as complicated as it looks, I just tried to step it out to make it more clear!)
1. Bring in the files to your Silhouette Studio software so it looks similar to this. Load your paper and place a sketch pen in and then select the silhouette sketch pen setting and then press cut. This will draw the sentiments on your paper. DO NOT UNLOAD YOUR PAPER YET.
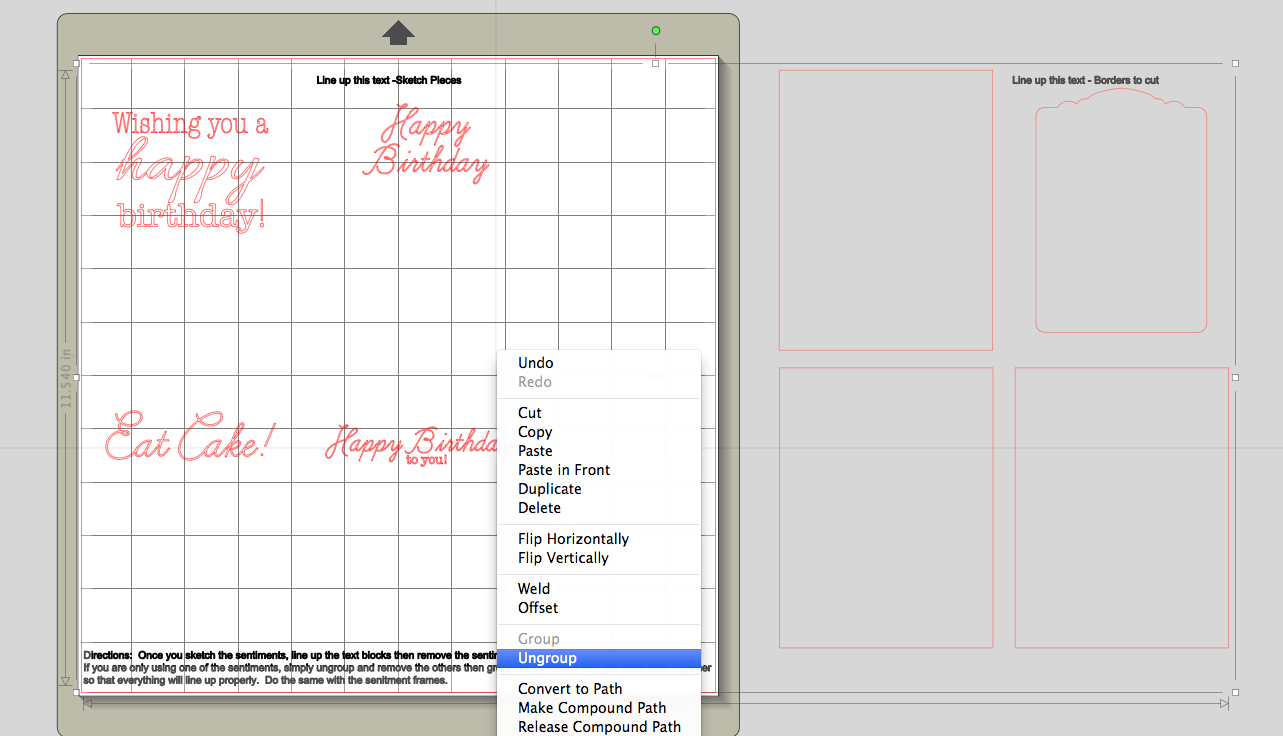
2. Once the file is done, DO NOT UNLOAD YOUR PAPER. Place your blade back in the machine. Ungroup the file once so the sentiments and frames are separate groupings.
3. Drag your frames over on top of the sentiments, lining up the "Line Up this Text". You may need to zoom in to make sure you have them lined up.
4. Click on one of the sentiments to select that grouping. Then delete the sentiments.
5. All you will have is the frames like this image. Change your settings to match your paper and cut.
Your cuts should look like this now!
The final project:
You can find both of these files HERE.