This chocolate peanut butter egg fold-over candy holder holds 1 egg. The holder is approximately 3-1/4" x 2-1/4" x 3/4" when assembled. The file comes with the base, coordinating mats, the center candy holder, and the decorative paper element shown. This file assembles quickly making these ideal for classroom, workplace, or neighborhood treats! The file is compatible with both the 8x12 and 12x12 mats.
For these fold-over candy holders:
1. Cut out all your pieces and fold on the score lines. Adhere mats as shown. This is the outside view.
2. Adhere your curved mat and message mat to the inside as shown.
3. Gather your box insert piece and place adhesive on the two small tabs (inside area). The tabs adhere back behind the box insert as shown.
4. Place adhesive on the back of the box insert piece.
5. Adhere the box insert to the inside center, lining up the edge as it will also adhere to the box cover. Place adhesive on the bottom of the box insert.
6. Adhere the box insert to the box cover.
7. Fill with your Reese's Egg (1.2oz/34g) and write your message! Fold the message piece up and the curved box piece down and adhere your decorative piece on (I use foam adhesives for mine) then embellish as desired!
Chocolate Peanut Butter Egg Holder with Chick
Chocolate Peanut Butter Egg Holder with Bunny
Chocolate Peanut Butter Egg Holder with Bunny Feet
This large kiss gift box is designed to hold the 7oz Hershey Kiss but is perfect for all sorts of goodies including homemade cookies! The box is approximately 3-3/4" x 3" x 3-3/4" and is compatible with the 8x12 and 12x12 mats.
The file is grouped together so be sure to ungroup the pieces before cutting.
This is how I move my pieces for cutting.
Here is the tutorial:
1. Cut out all your pieces and adhere the mats in place as shown. Place adhesive on the four tabs as well as along the bottom of the long piece (shown with white adhesive tape in images). Assemble your heart pieces. I use foam adhesive for each level.
2. Adhere the long center piece to the box base so the score line is even with the box base side. This will form the complete box piece.
3. Inside view of the box adhered together.
4. Adhere the box tabs to the box sides to form the box shape. Tuck the lid tab inside the box.
5. Adhere the heart pieces to the top of the box. I use foam adhesive to adhere then I have added a ribbon to the center.
6. Open box and fill with the 7oz Hershey Kiss or other items!
This Holly Treat Box is approximately 3-1/2" x 3-1/4" x 1-1/4" and holds 3 Ghirardelli Chocolate Squares or one Little Debbie Christmas Tree! To assemble, fold on the score lines and adhere the small side tab to the box to form its shape. Tuck the bottom flap that has the slot opening up, bring the two side tabs in, then complete by tucking the tab into the slot opening. Adhere the mats in place and use foam adhesive to adhere the holly to the front of the box!
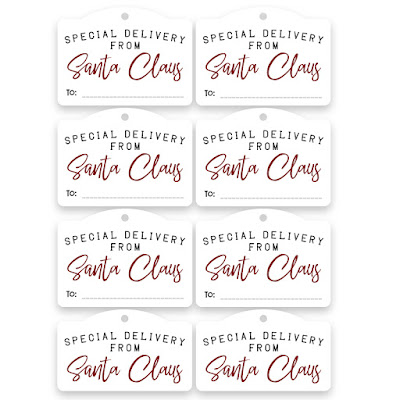
Looking for last minute tags? These Print and Cut Tags are easy and perfect for those special gifts from Santa or secret gift giving! These come as a set of 8.
This skull tray can be used for holding candy, appetizers, or even as a home decor piece. The tray measures approximately 2-1/8" x 8-1/2" x 6-1/4" and comes with the tray base, two end covers, and one center mat. The file is compatible with both the 12x12 and 8-1/2x12 mats.
Here is the tutorial:
1. Cut the pieces and fold on the score marks.
2. Place adhesive on the four tab pieces.
3. Adhere the tabs to the box sides.
4. Your tray will look like this now.
5. Place adhesive on the back of the side panels.
6. Adhere the side panels in place to cover the tabs.
7. Place adhesive on the backside of the tray mat.
8. Adhere it to the bottom of the tray.
9. Fill your tray with goodies. We have lots of Halloween ring pops in ours!
Today I am sharing a cute little box that is perfect for storing treats! It cuts in one piece and goes together really quick, only needing four little strips of adhesive to hold the sides of the box. The top of the box has a slot closure making it easy to get in and out of!
This box can be scaled to fit with 8-1/2" x 11" cutting mat as well for a smaller sized box. Here is the 12x12 version and the 8-1/2x11 versions together...
Tutorial:
1. Cut out the Candy Box One file using your digital cutting machine and fold on all the score marks.
2. Place adhesive on the four little tabs as shown.
3. Pull the side up and adhere the two tabs to the front and back pieces.
4. Repeat step 3 for the other side.
5. Place the slot tab side down first then place the circular tab into the slot and push until closed.
6. Your box should look like this image!