This box is approximately 4-1/2" x 2-1/4" x 1" and hold a standard size gift card that pops up when the box is opened. The box is compatible with both the 8x12 and 12x12 mats and the come with the paper elements shown. The boxes can be used without the gift card insert as well making a small hinged box to store gifts! The bow can also be used on its own.
You can find the tutorial for the box here:
And the tutorial for the bow here:
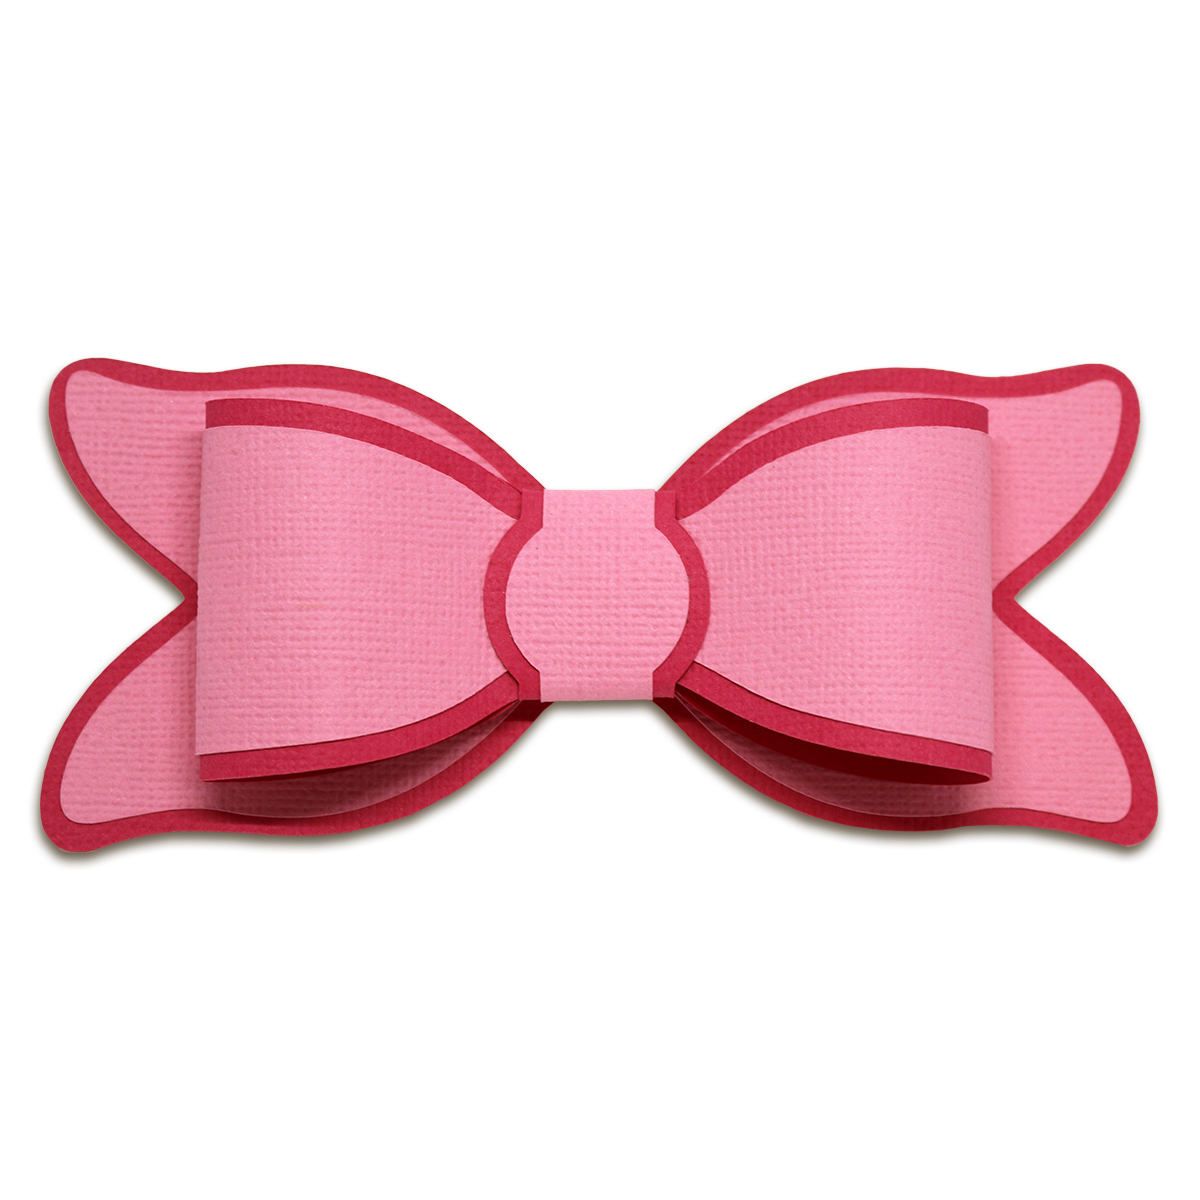
This bow is perfect for gift wrapping, placing on vases, or even for the front of a card! It comes with an alternative center which you can see in the additional images. The bow can be sized to fit your needs and is compatible with both the 8x12 and 12x12 mats! See my blog for a tutorial!
Here is the tutorial:
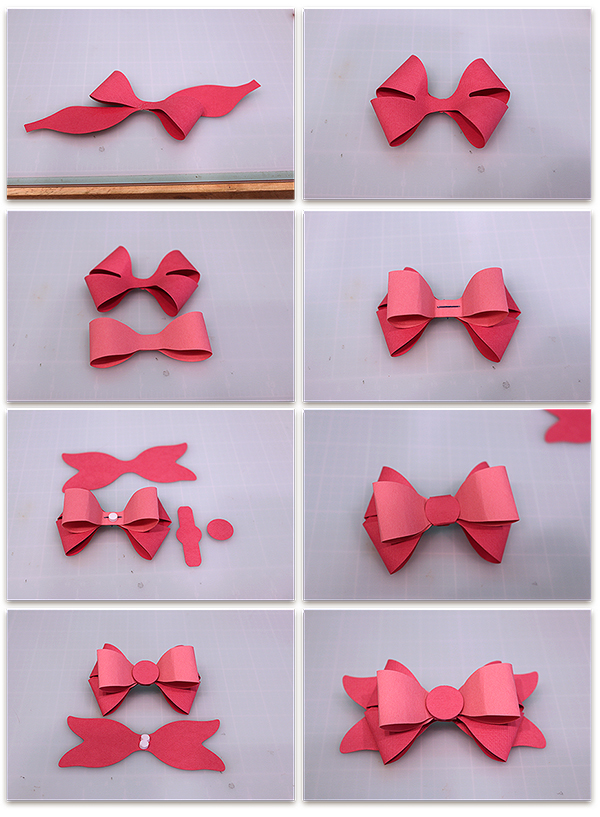
1. Cut out the pieces. Adhere the coordinating pieces togeter.
2. Starting with the large bow piece, adhere the tabs to the back of the bow with a strong adhesive (double-sided tape or hot glue). You can staple the center as well, it will be covered. Place the round center piece in the center of the bow and fold the edges over. Adhere in place. I use Scotch Quick-Dry Adhesive and these amazing little clips to hold it while it dries!
3. Adhere the bow to the tails with a foam adhesive. You can use the bow like this or you can cut the small circle center and tie a ribbon bow on top as shown below!
* * * * * * * *
Puckered Layered Bow with two center options!
* * * * * * * *
Double Layered Bow
This bow only comes with the solid center.
You can use it with or without the extra circle piece.
* * * * * * * *
This bow is perfect for gift wrapping, placing on vases, or even for the front of a card! The bow can be sized to fit your needs and is compatible with both the 8x12 and 12x12 mats!
Double Split Bow with Two Colors
* * * * * * * *
Double Split Bow
* * * * * * * *
Split Bow
* * * * * * * *
Double Bow with Two Color Base
This bow has two different mat pieces for the base. As shown in the photo, the left side is a solid blue to match the lower bow piece and the right side is shiney to match the upper bow piece. This bow can be layered on top of itself as well as the bow pieces are different in size.
This image shows the contrast better for the color layers:
* * * * * * * *
These files are compatible with both the 8x12 and 12x12 mats.
The cut files can be sized to fit your needs!
This layered bow comes with all the pieces shown and are compatible with both the 8x12 and 12x12 mats. You can also size the bows to fit your needs! This bow would be so cute on top of gifts or with your gift bags!
Here's the tutorial:
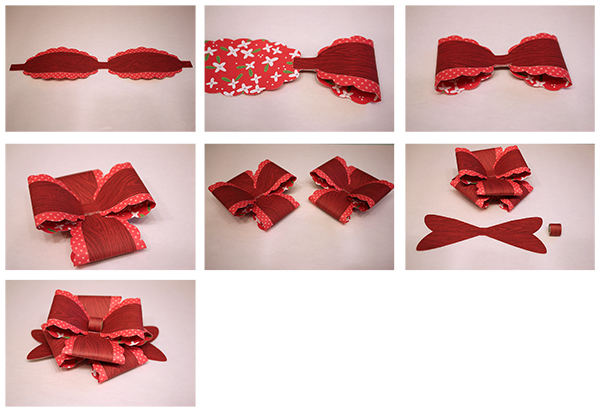
1. Cut out the bow pieces. Layer the oval bow strips on top of the ruffled bow strips.
2. Flip the bow strip so the back is facing up. Place adhesive in the back center. Bring over one side and line up the edges.
3. Place adhesive on the center again and bring over the remaining side.
4. Do this for all four bow strips. Adhere two together as shown.
5. You should have two combined pieces now.
6. Adhere the two bow pieces together, staggering the bows. With the small rectangle piece, place adhesive on one end and form a loop and adhere in place.
7. Adhere the bow on to the bow base and adhere the loop in the bow center!
You can find the Silhouette files here
These Halloween Gable Boxes are approximately 5" x 3-1/2" x 2-1/4" and come with the one piece Gable Box, the coordinating mats, and the decorative front piece which comes with two mats and the detail cut. The box and decorative pieces can be used together as shown or separately. They can also be sized to fit your needs. All pieces are compatible with both the 8x12 and 12x12 mats.
Here's the tutorial:
1. Cut out the Gable Box and fold on the score lines as shown. Place adhesive on the side tab.
2. Adhere the side tab to the other side of the box.
3. Place adhesive on the bottom side tabs and push them in then push on of the longer tabs down and adhere in place.
4. Adhere the remaining tab in place to close the bottom.
5. Push down on the main portion of the box top and push the side slots over each side tab.
6. Adhere the mats in place.
7. Next cut your bow pieces. Place adhesive in the center of the back of the bow and adhere two ends down to the center, lining up the loop edges.
8. Adhere the remaining two bow tabs to the center.
9. Grab the two bow piece and adhere those ends to the center as you did before.
10. Adhere the two bow piece on top of the four bow piece as shown.
11. Roll the rectangle piece around a pen or pencil barrel and adhere the ends together to keep the shape. Adhere the center to the middle of the bow.
12. Adhere the bow to the box and embellish and fill as desired!
You can find this file in my stores soon!

This file comes with the bow planner clip pieces and the pieces to create the Planner Clip Folder which is great for storing the planner clip as well as gifting it!
The folder is approximately 3-1/2" x 5" with a 1/2" fold on one side. The folder has a built in tab handle that secures the folder shut.
Here is the tutorial:
1. Cut out the pieces and adhere the full mat on the folder as shown.
2. Place adhesive on the remaining mats, leaving the areas with the slits without adhesive.
3. Assemble your planner clip. I use foam adhesive to press the clip in with this one as shown in the photo.
4. Your clip should look like this now.
5. Adhere your mats in place. The two slit mat goes on the panel nearest the closing tab. The one slit goes toward the left edge of the other panel.
6. Slide in your clip.
7. Insert your tab into the single slot.
8. Press in to close the folder.
9. Your folder will look like this now. Embellish as desired.
For this clip, there is a slot within the scallop cut. Simply slide your large paper clip through the slot and then adhere the rose pieces on with foam adhesive.
This bows comes with all the pieces shown and is compatible with both the 8x12 and 12x12 mats. You can also size the bow to fit your needs! These would be so cute on top of gifts or even to go on Holiday Tags!
Here's the tutorial:
1. Cut out all your pieces.
2. Adhere your smaller layer on top of your larger for all three sets as shown.
3. Adhere the tabs to the center (backside) of the bow to form the loops. Do this for all six bow pieces. Note: Use a strong adhesive like/similar to Hot Glue or Zip Dry to keep the loops together.
4. Adhere the coordinating loops together as shown.
5. Begin with the largest bow and place a foam square in the center. Adhere the medium bow set in place, staggering the loops.
6. Adhere a foam square in the center of the medium bow and adhere the small bow set in place. Adhere the center layer on the larger layer.
7. Bend the center piece around a pencil/pen and adhere to itself to form a loop. Adhere the loop in the center of the bow.
8. Adhere the bow ends in place on the bottom of the bow.
Today I am sharing my new Holiday Bows! These bows come with all the pieces shown and are compatible with both the 8x12 and 12x12 mats. You can also size the bows to fit your needs! These would be so cute on top of gifts or even to go on Holiday Tags!
Here is the tutorial:
Here is the tutorial:
Here is the tutorial:
Here is the tutorial:
You can find the Silhouette files here


