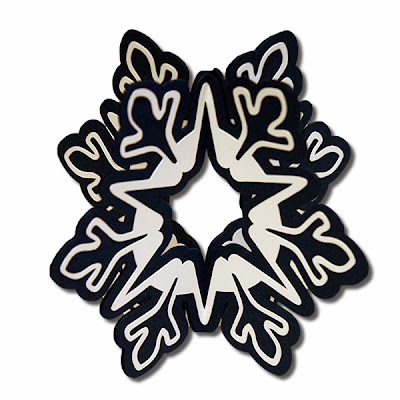
3D Snowflakes!
Is it starting to feel like Winter where you are? I am in Michigan and I am afraid Fall is already moving on and Winter is starting to show. I don't think I am quite ready real snow...but I am having fun building 3D Paper Snowflakes! The 3D snowflakes are perfect for hanging on the tree, hanging on gift bags, or even sitting out on the table for home decor accents! We have even used 3D snowflakes tied on mugs for tags for Teacher gifts! So many possibilities!
Today I have three versions to share with you!
First up is my 3D Layered Snowflake! This snowflake is a lot of fun as you can change the look so much by changing the papers and you can size it to your needs!
Here is the tutorial:
1. Cut out the four decorative pieces and four mats in your desired papers.2. Adhere the decorative pieces to the center of the mats.
3. Fold the snowflakes on the provided score lines.
4. Place adhesive on the back of one of the snowflake mats.
5. Then adhere a second on to it.
6. Continue adding adhesive to the backs and adhering the snowflakes on until they are all on.
7. Your snowflake should look like this when completed. You can tie a piece of twine through the center hole to hang or leave it as it is!
Next up is my 3D Hanging Snowflake!
This snowflake comes with four pieces with two containing a hole so that it can hang easily.
Here is the tutorial:
1. Cut the four pieces in your desired papers.
2. Fold the snowflakes on the provided score lines.
3. Starting with one of the pieces with the hole, place adhesive all over one side.
4. Adhere the second hole piece in place, matching up the ends.
5-8. Continue adding adhesive to the backs of the snowflakes and adding in the snowflake pieces.
9. Place twine through the hole of the snowflake to finish!
Lastly, my 3D Puffy Layered Snowflakes!
These come with a decorative snowflake and a mat snowflake so you can customize your colors! You could hang this one or even use it on your cards and scrapbook pages!
These snowflakes have a hole in the center I have them showing with a jeweled brad as well as a button. Here are the tutorials for each:
1. Cut out the pieces and adhere the decorative cut in the center of the mat cut.2. For this one I am using a decorative brad.
3. Turn your snowflake over, push your brad up through the center so the stems are sticking up.
4. Start bringing in each side and sticking the circle hole over the brad stems.
5-11. Continue bringing the sides over and pushing the brad stem up through them.
12. Once you have all the ends over, fold the brad ends down.
13. Flip your snowflake over and it is now ready to use!
Button Tutorial:
1. Cut out the pieces and adhere the decorative cut in the center of the mat cut. Gather your button and twine and string the button.
2. Turn your snowflake over, push your twine up through the center. Your button will be down on your desk.
3. Start bringing in each side and stringing the twine up through each hole.
4-5. Continue bringing the sides over and pushing the twine up through them.
6. Once you have all the ends over, push the twine up through a second button and tie in a knot. Trim the twine ends.
7. Flip your snowflake over and it is now ready to use!
I like to use the button versions for hanging on my tree or on gift bags
as both sides look decorated!
You can find all these files HERE!
Tags:
3D
3D Snowflake
Bits of Paper
Christmas
Christmas Tree
Jamie Cripps
Jamie Lane Designs
Ornaments
Silhouette
Snowflake
Snowflakes
Tutorial


2 comments