This Lucky Basket is approximately 3-3/4" x 3-3/4" x 3" (6" with handle) with the bottom of the box measuring 2.625" x 2.625. The file comes with the one piece basket base, the basket handle, a basket handle mat, two clover cut-out mats, two inside clovers, and a basket bottom insert. The file is compatible with the 8x12 and 12x12 mats. This basket would be perfect for St. Patrick's Day as well as Good Luck treats!
This box is easy to assemble making it great for bulk creation or last minute gifts!
Adhere the basket mats in place and fold on the score lines. Adhere the mat to the handle. Place adhesive on the side tab as well as the three bottom tabs. Adhere the side together to form the basket shape then push the three bottom tabs in and adhere the bottom closed. There is a square cut the same color of the basket, that is adhere to the inside bottom to finish off the look (hides the tabs). Insert the handle (Tip: I rub mine against the edge of my desk to give it a curve) and use foam adhesive to pop up the clover pieces! Fill and embellish as desired!
This Holly Treat Box is approximately 3-1/2" x 3-1/4" x 1-1/4" and holds 3 Ghirardelli Chocolate Squares or one Little Debbie Christmas Tree! To assemble, fold on the score lines and adhere the small side tab to the box to form its shape. Tuck the bottom flap that has the slot opening up, bring the two side tabs in, then complete by tucking the tab into the slot opening. Adhere the mats in place and use foam adhesive to adhere the holly to the front of the box!
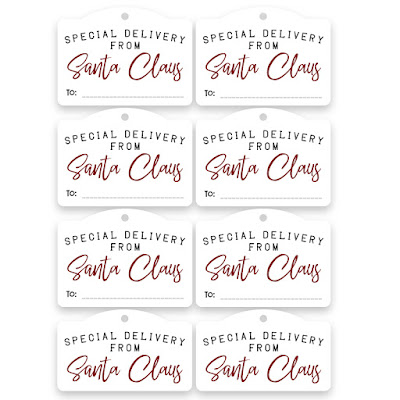
Looking for last minute tags? These Print and Cut Tags are easy and perfect for those special gifts from Santa or secret gift giving! These come as a set of 8.
You will find my new Fold and Tuck Box this week in my Silhouette store!
This box is approximately 4-3/4" x 2-1/4" x 2-1/4" and would be perfect for small gifts or party favors! The box has a flap with a tab that folds over the top of the box and tucks into the slot making it easy to open and close.
Here is the tutorial:
1. Cut out the Fold and Tuck Box file in the desired papers.
2. Adhere the mats on the corresponding areas as shown.
3. Fold on all the score marks, folding in two of the score lines as shown. Place adhesive on the four side tabs.
4. Adhere the tabs to the sides.
5. Fold the top flap over the front of the box and tuck the tab in.
6. Push the tab in to close the box and embellish as desired!
This box is sized to fit the Cameo 12x12 mat and will need to be scaled down to fit the Portrait.
Happy 2013!
Yikes...that looks weird :) I am really looking forward to this New Year! I have lots of exciting things happening and I just can't wait to share them with each of you...so be sure to keep following!
I am sure you have seen that SRM is carrying glassine bags by now...I know I am just loving them! For today's project, I used lots of SRM goodies and I was AMAZED at how well the stickers blended right in to the glassine!
Yes, I am totally in love!
SRM Supplies:
#65004 Glassine Bag
#38001 Tubes
#57007 We've Got Your Border, Valentines
#51016 Sticker Sentiments, Wishing You Well
#53003 We've Got Your Sticker, Sweet
#63003 Labels By The Dozen, Christmas
Other supplies:
Cricut Imagine More Cartridge, Provo Craft
2-5/16" Scallop Circle Punch, The Paper Studio
Maraschino Twine, The Twinery
Be sure to stop by the SRM Blog to see what the other designers have been creating with their glassine bags!