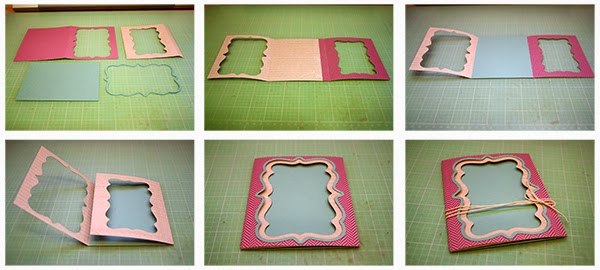
Today I am sharing my new A2 Fancy Layers Cards. The cards are A2, approximately 4-1/4" x 5-1/2", in size and comes with the card base with the shape cut, a rectangle mat, a larger hinged piece with a smaller shape cut, and some with a frame for the front of the card. Once assembles, the card has two sides, the right folding in first and then the left covering. All of these files are compatible with the 8x12 and 12x12 mats.
Here is the tutorial:
1. Cut out all your pieces and fold on the score lines.
2. Adhere the hinged shape cut to the right edge of the card base as shown.
3. Adhere your rectangle mat to the center to cover the hinge.
4. Fold the right side in...
5. Then fold the left side over. Adhere the frame in place on the front.
6. Embellish as desired!
Here's a look at what the card looks like unfolded:
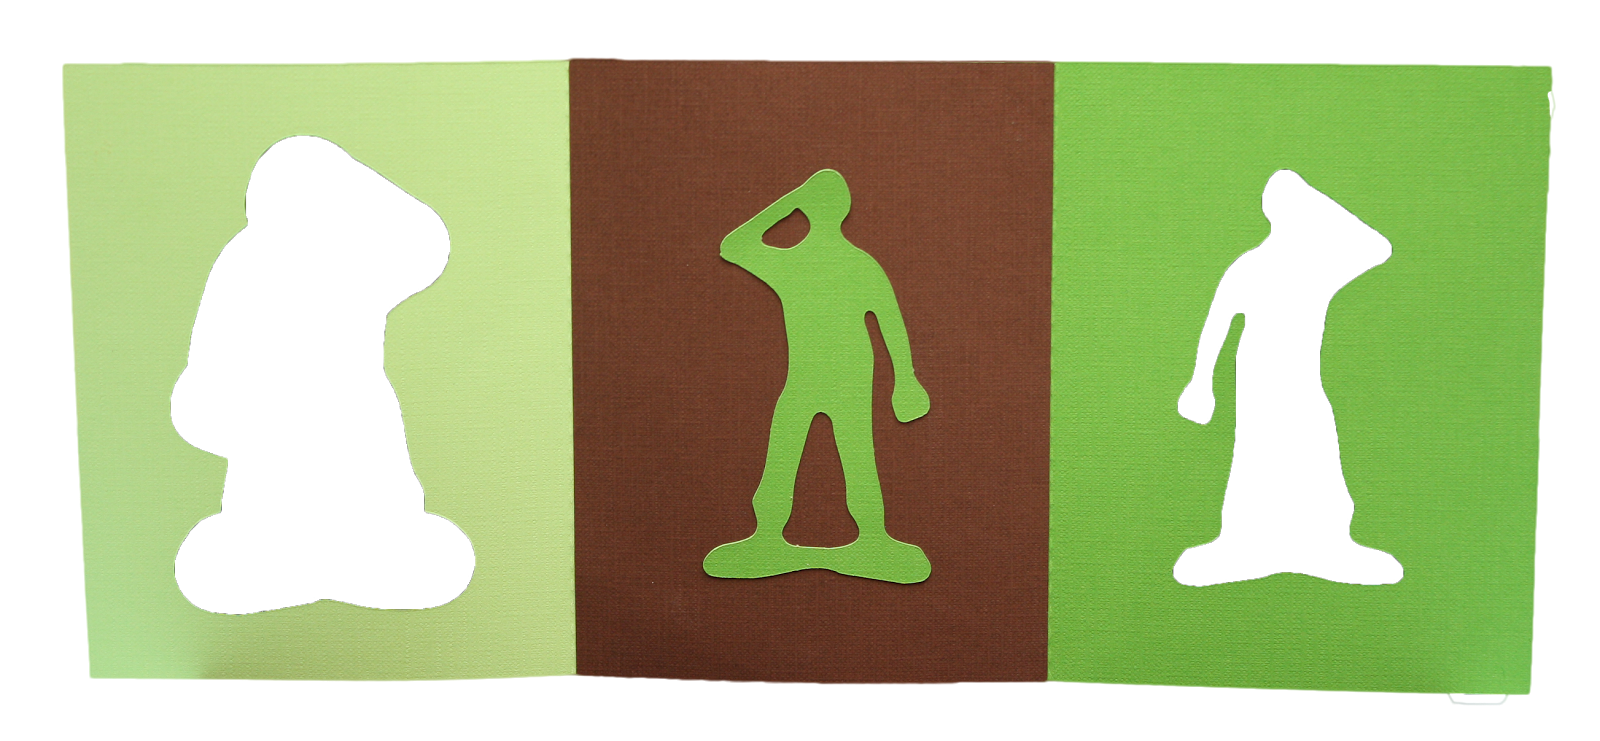
Good morning! Today I am sharing two new USA cards with you! You can find both of these cards in my Silhouette Store. They are both A2 in size (approximately 4-1/4" x
5-1/2") and come with the card base and all the paper elements
shown to create the card and/or banner shown.
You can use this one as a card or just use the pieces to decorate a 3D project or layout!
Here is one I have cut and embellished!
To start, I cut out the shapes I wanted to use for my card with my Silhouette
and created a cardbase using the brown bag kraft cardstock.
To finish the card, I created dashes around the star with a blue marker and added ribbon and twine to embellish!
Super quick and I love the patriotic colors!
Other Supplies:
Misc: Blue Marker
This card comes with the detail built into the card base and has a mat to go behind the details (shown in red here) and the USA detail (shown in white).
This card is A2 (approximately 4-1/4" x
5-1/2") in size and comes with the card base, two card base mats, two
large labels, and two oval labels. All
of these files are compatible with the 8x12 and 12x12 mats.
Here's the tutorial:
1. Cut out all your pieces and fold the card base on the score lines.
2. Adhere your base mats in place as shown.
3. Fold the card so the right side goes in first and then the left covers over. Your label cut should be on top.
4. Adhere the label cut in place, lining up the edges with the card base.
5. Assemble your label mats with foam adhesives then adhere to the label cut.
6. Tie ribbon or twine to secure the card and embellish as desired!
These cards are A2 (approximately 4-1/4" x 5-1/2") in size and come with the
card base, two rectangle mats
(inside and back of card), and two decorative mats. If you want to have
mats for the inside piece of the cards, you can flip the mats horizontally in Silhouette
Studio then cut again for the inside areas! The main card base is all one
piece and the sides fold over to the center. All of these files are
compatible with the 8x12 and 12x12 mats.
You can find my additional A2 Fancy Fold cards along
with tutorials through the link below:
All of these cards assemble using the tutorial linked above. The images below the cards just show you the shapes in more detail and how the mats go on.