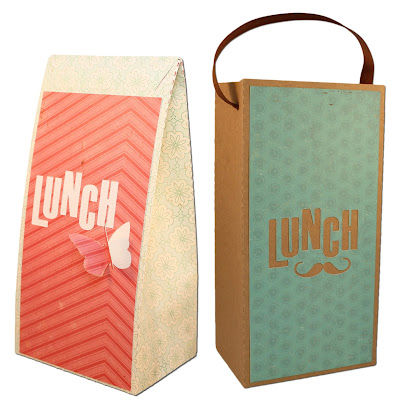
Lunch Bag - Two Ways!
Who doesn't love an adorable sacked lunch!? I designed these lunch bags so that you could create fun lunch bags for yourself or your kids and they fold flat so you can store them until they are ready for use! Each lunch bag is approximately 4" x 2-7/8" x 8". The butterfly box has a fold over flap to hold it closed and the mustache box has two holes for a ribbon handle. Both of these boxes can be cut on the 12x12 or 8-1/2x12 mats.
You can also use these bags without the "lunch" panel cut-out!
1. Cut the pieces in your desired papers, fold on the score lines then place adhesive along the inside edge of the non-slotted piece as shown.
2. Add adhesive to the front side of the slotted piece on both the long tabs.
3. Adhere the piece together.
4. Next gather your lunch panel and inside mat.
5. Place adhesive around the cut out pieces
6. Adhere the inside mat behind the letters as shown.
7. Place adhesive on the back of the lunch panel and adhere it to the main box as shown.
8. Pop the box out to form its shape. Push the two side tabs in.
9. Then fold the slotted panel down and tuck in the tab and close.
10. For the top, push the sides in slightly.
11. Then fold the tabbed area over and tuck it into the slot.
12. Push until closed.
13. Your box should look like this.
14-17. If you want, you can fold the butterfly piece in half and then adhere center of the cut butterfly.
The mustache box goes together the same. Here are the photo steps!
Tags:
3D
Bag
Butterfly
Jamie Cripps
Jamie Lane Designs
Lunch
Lunch Bag
Mustache
Sack Lunch
Silhouette
Tutorial


1 comments