Welcome to the Samantha Walker Creative Crafters Team Blog Hop!
You should have arrived here from Diana Fisher's blog!

We have a fabulous giveaway for our hop!
This month you could win the All Boy Stamp Set!
This stamp set is 6" x 8" and includes 35 Clear Stamps!
This stamp set is 6" x 8" and includes 35 Clear Stamps!
All you need to do is enter below using the Rafflecopter widget! You can earn multiple entries by following us on Facebook, commenting below, tweeting about the giveaway, and signing up for the email updates. This giveaway is open to US customers only.
Our theme this month is Family Fun! I used Samantha's Square Puzzle Silhouette Cut File and the Cool Summer Collection to create a double-sided puzzle, with one side being more challenging than the other! I put the puzzle in Samantha's 3D Tuck Bag and included a score sheet (because we are crazy competitive around here!). I love that the kids can sit down and do the puzzle on their own with a timer and then add in their time!
The bike side is much harder than I thought it would be but I love challenging the kids. For the initial score sheet I will have them do the Ice Cream side and then next week I will change it to have them do the Bikes!
How perfect would these be for traveling this Summer?
Samantha Walker Supplies:
Silhouette Cuts: Square Puzzle and 3-d samantha walker tuck bag
Other supplies:
Ribbon: Baby Pink/White Polka Dot Wired Ribbon (Ribbons Unlimited)Twine: Solid Caribbean (The Twinery)
Here's how you can make one of your own!
Tutorial:
1. I cut out the puzzle with a thick white cardstock to use as the base and then I cut out the ice cream paper. I took each piece off my mat and adhered it on to the white puzzle base.
2-3. These images show the puzzle being completed by gluing the pieces. It looks like a lot of work, but it goes super quick!
4. Next, I placed the bike paper down on my mat and cut the puzzle again (you could flip the image as well if you do not want to put your paper down on the sticky mat). It just needs to be reversed since it will be on the back of the puzzle.
5. Flip over your puzzle so the backside is up.
6. I removed one corner piece and adhered it on the puzzle while it was still on my mat. This is for placement.
7. Apply adhesive all over the back of the puzzle on the mat then lift up your puzzle and press the white side down to adhere, making sure to line up your puzzle with the placement piece.
8. Once you have your puzzle glued together, remove the pieces from the mat.
9. Next, cut out the box and fold on all the score lines.
10. Adhere the mat pieces on the box as shown.
11. Place adhesive on the side tab and bring the side over and adhere.
12. Glue the bottom of the box together.
13. Insert your puzzle pieces.
14. Tuck the top of the box in the slot.
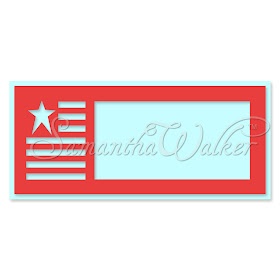
15. This is an image of our score sheet, which is included inside our box!
Don't forget to sign up for Samantha's Newsletter
through the Rafflecopter widget to receive your
FREE SVG and Silhouette Studio file!
Thanks so much for stopping by! Click on the image below to head over to
|
Happy Hopping! |


I must say that this is adorable! I could see the endless possibilities of creating these puzzles and having my daughter put them together. Love it!
ReplyDeleteHugs,
Jo
♥ Jo's Scrap Shack ♥
Love the puzzle idea. Great way to give it as a gift. Love the papers.
ReplyDeleteThe double sided puzzle is such a great idea for the kids, and I love the bag you created to put it in.
ReplyDeleteWhat a really really great idea! Lots of fun!
ReplyDeleteWhat a neat idea. Love the puzzle, the bag and thanks for the tutorial.
ReplyDeleteWhat a great idea Jamie! I will have to add this to our road trip games list. TFS!
ReplyDeleteOMGoodness the bag is adorable and I love, love, love the puzzle! TFS
ReplyDeleteThis is a way fun idea! You are so smart!
ReplyDeleteLove it Jamie!
ReplyDeleteSuper fun project, Jamie...and what a wonderful presentation!
ReplyDeleteI love this idea!
ReplyDeletelove the package
ReplyDeleteFantastic puzzle! Always good to challenge kids' minds from time to time :)
ReplyDeleteAbsolutely ADORABLE!
ReplyDeleteSuch a creatively fun idea. TFS.
ReplyDeleteD~
http://designsbydragonfly.blogspot.com
Wow! Jamie, what a great idea! Love your post!!
ReplyDeleteWhat a cute bag. I love your idea's and those puzzle pieces are great.
ReplyDeleteSuper cute Jamie. I love treat bags and yours is just perfect and so adorable!
ReplyDeleteDeb C
Bugjuiced
Really cute and fun idea!
ReplyDeleteI love that bag file of Samantha's and you created such a great fun project with it!
ReplyDeleteBoy, that is really clever! Nice going! Leslie
ReplyDeleteGreat idea for a party favor! I might have to try this with my Silhouette soon.
ReplyDeleteThat's fabulous Jamie, love it!
ReplyDeleteGenius! Never would have thought of a double sided puzzle! I love this idea...and thanks for the tutorial :)
ReplyDeleteGreat idea. If some of the pieces get lost you're not out a lot. Love the bag.
ReplyDeleteOh my goodness, your puzzle and bag are beyond cute! Thanks for the instructions, too.
ReplyDeleteWhat a fun, family project! Thanks for shaing your tutorial!
ReplyDeletecutest project
ReplyDelete